An Example Python Project
In this section, we will create a Python project that utilizes the WhiteboxTools library to interpolate a LiDAR point-cloud, to process the resulting digital elevation model (DEM) to make it suitable for hydrological applications, and to perform a simple flow-accumulation operation. I suggest using an advanced coding text editor, such as Visual Studio Code or Atom, for this tutorial, but Python code can be written using any basic text editor.
Begin by creating a dedicated project directory called FlowAccumExample and copy WhiteboxTools binary file (i.e. the compressed file downloaded from the Geomorphometry & Hydrogeomatics Research Group website) into this folder. Using the decompression software on your computer, decompress (i.e. an operation sometimes called unzipping) the file into the newly created FlowAccumExample directory. You will find the compressed file contains a folder with contents similar to the following:
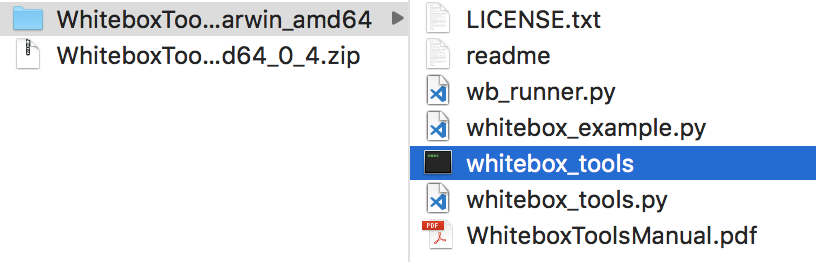
The folder contains a number of files, including the WhiteboxTools executable file, the whitebox_tools.py python script, the WhiteboxTools Runner (wb_runner.py; see below), and this user manual. It is likely that the folder has a name that reflects the operating system and architecture that the binary file was compiled for (e.g. WhiteboxTools_darwin_amd64). Rename this directory to WBT. Also note, depending on your decompression software, it may be the case that the contents of the WBT folder itself contains a sub-directory that actually holds these files. If this is the case, be sure to move the contents of the sub-directory into the WBT parent directory.
Using your text editor, create a new Python script file, called FlowAccumulation.py within the FlowAccumExample directory. We will begin by importing the WhiteboxTools class from the whitebox_tools.py script contained within the WBT sub-directory. Unfortunately, Python's module system is only able to import classes and function definitions declared in external Python scripts if these external files are contained somewhere on the Python path or in the directory containing the script file into which you are importing. This is important because based on the project structure that we have established, the whitebox_tools.py script is actually contained within a sub-directory of the FlowAccumExample directory and is therefore not directly accessible, unless you have previously installed the script on the Python path. Another, perhaps easier solution to this problem is to create a file named __init__.py (those are two leading and trailing underscore characters) within the FlowAccumExample directory. The presence of this empty file will make Python treat the WBT directory as containing packages, in this case, the whitebox_tools package. For more information, see the Python documentation on modules and packages.
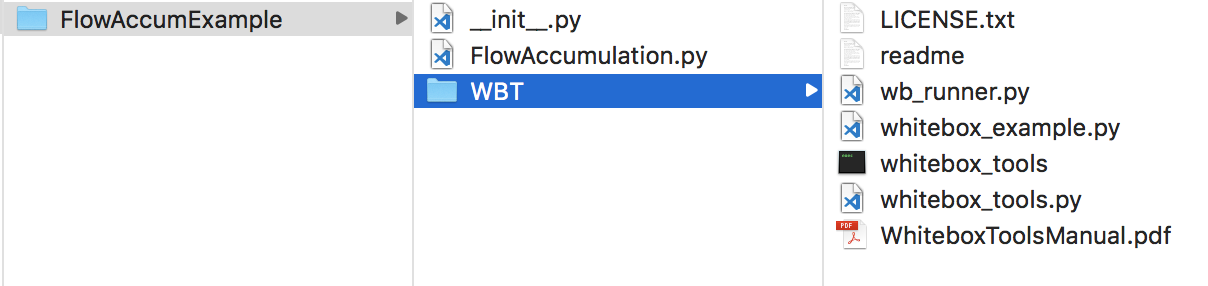
At this stage, you should have a project directory structure like the following:
Many operating systems will disallow the execution of files that are downloaded directly from the Internet. As such, it is possible that you will need to explicitly give the whitebox_tools.exe permission to execute on your computer (Note: here we are referring to the compiled WhiteboxTools binary file and not the similarly named Python script whitebox_tools.py also contained in the folder). The procedure for doing this depends on your specific operating system. On MacOS, for example, this is usually achieved using the 'Security & Privacy' tab under 'System Preferences'. To test whether whitebox_tools.exe has permission to run on your system, double-click the file. If the file is configured to execute, a command terminal will automatically open and the WhiteboxTools help documentation and a listing of the available tools will be printed. If this does not occur, you likely need to give the file permission to execute.
Using your text editor, you may now add the following lines to the FlowAccumulation.py file.
from WBT.whitebox_tools import WhiteboxTools

wbt = WhiteboxTools()
In the import statement, WBT is a reference to the package folder containing the WhiteboxTools files; whitebox_tools is a reference to the whitebox_tools.py script contained with this package folder; and WhiteboxTools is a reference to the WhiteboxTools class contained within this script file. Please note that if you named your directory containing the WhiteboxTools files something other than WBT, you would need to alter the import statement accordingly.
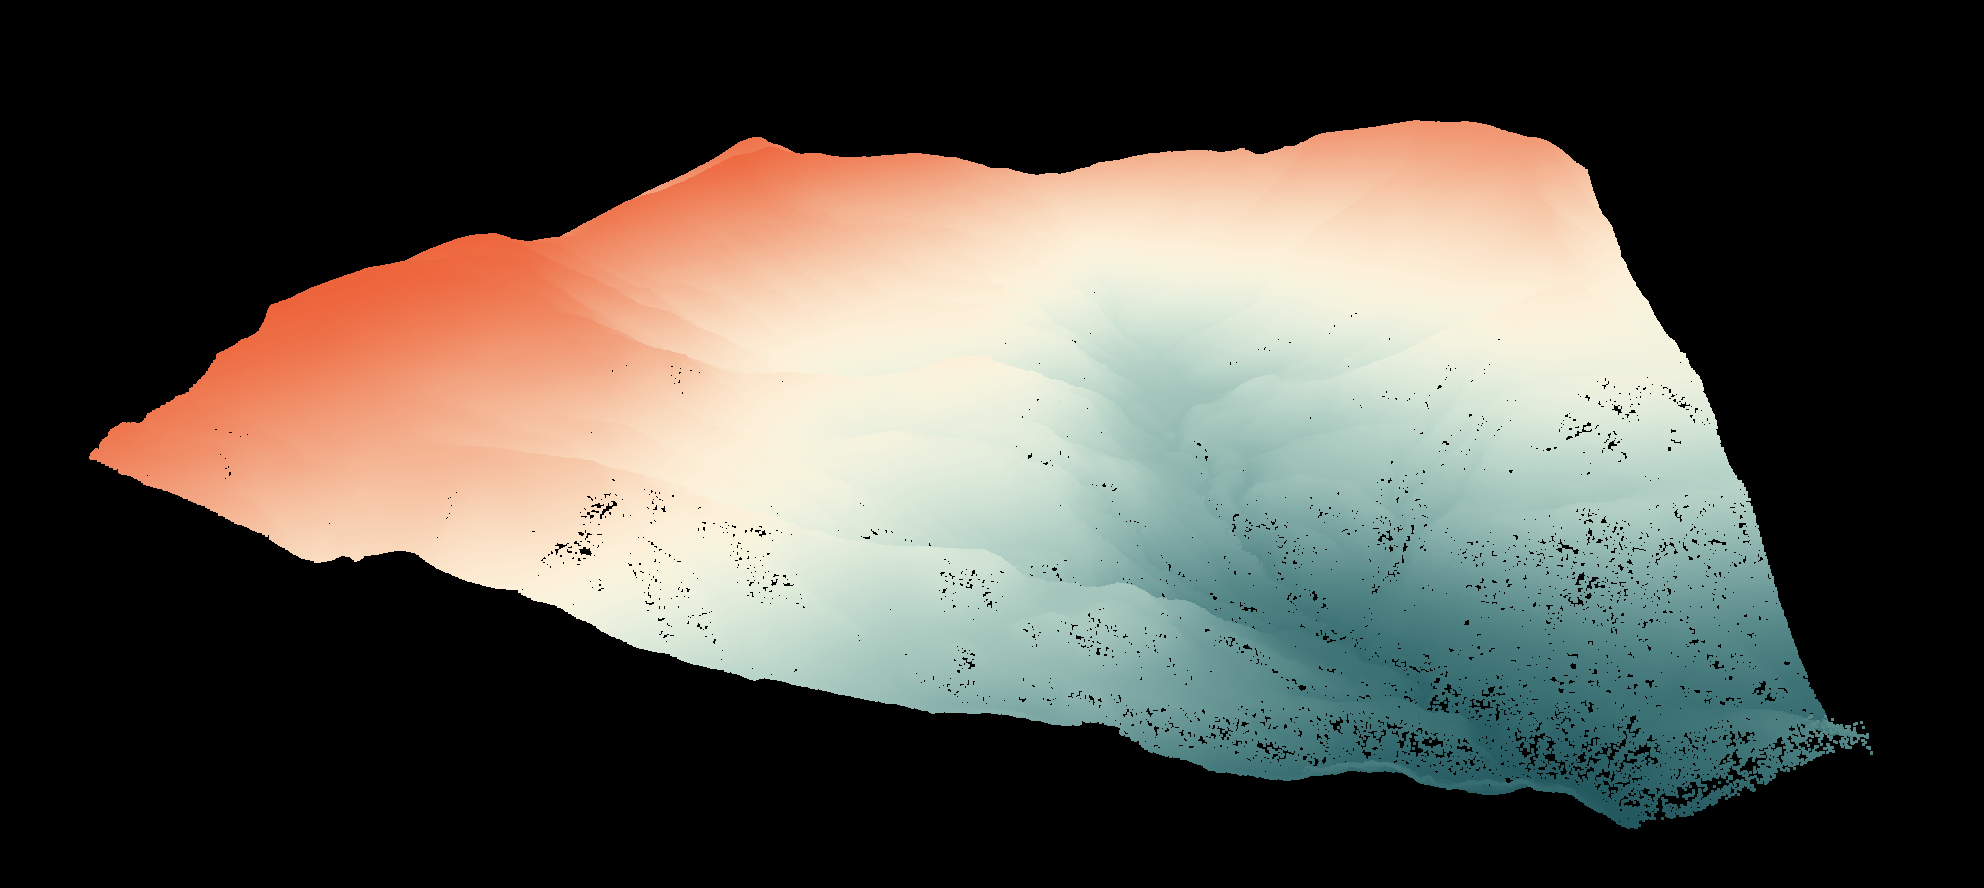
Download the St. Elis Mountains and Gulf of Alaska sample data set (StElisAk.laz) from the WhiteboxTools section of the site and decompress the zip file. This file contains a LiDAR point cloud that has been previously filtered to remove points associated with non-ground returns, mainly trees (Figure 4). Create a sub-directory within the project folder called 'data' and copy StElisAk.laz into the folder.
Now we can complete our flow accumulation analysis with the following code:
import os
from WBT.whitebox_tools import WhiteboxTools

wbt = WhiteboxTools()

# Set the working directory, i.e. the folder containing the data,
# to the 'data' sub-directory.
wbt.set_working_dir(os.path.dirname(os.path.abspath(__file__)) + "/data/")

# When you're running mulitple tools, the outputs can be a tad
# chatty. In this case, you may want to suppress the output by
# setting the verbose mode to False.
# wbt.set_verbose_mode(False)

# Interpolate the LiDAR data using an inverse-distance weighting
# (IDW) scheme.
print("Interpolating DEM...")
wbt.lidar_idw_interpolation(
i="StElisAk.laz",
output="raw_dem.tif",
parameter="elevation",
returns="last",
resolution=1.0,
weight=1.0,
radius=2.5
)

# The resulting DEM will contain NoData gaps. We need to fill
# these in by interpolating across the gap.
print("Filling missing data...")
wbt.fill_missing_data(
i="raw_dem.tif",
output="dem_nodata_filled.tif",
filter=11
)

# This DEM will contain grid cells that have no lower neighbours.
# This condition is unsuited for flow-path modelling applications
# because these operations assume that each interior cell in the
# DEM has at least one downslope neighour. We'll use an operation
# called depression breaching to 'fix' the elevations within the
# DEM to enforce continuous flow.
print("Performing flow enforcement...")
wbt.breach_depressions(
dem="dem_nodata_filled.tif",
output="dem_hydro_enforced.tif"
)

# Lastly, perform the flow accumulation operation using the
# D-infinity flow algorithm.
print("Performing flow accumulation...")
wbt.d_inf_flow_accumulation(
dem="dem_hydro_enforced.tif",
output="flow_accum.tif",
log=True
)

print("Complete!")
To run the above script, open a terminal (command prompt), cd to the script containing folder, and run the following command:
>>python FlowAccumulation.py
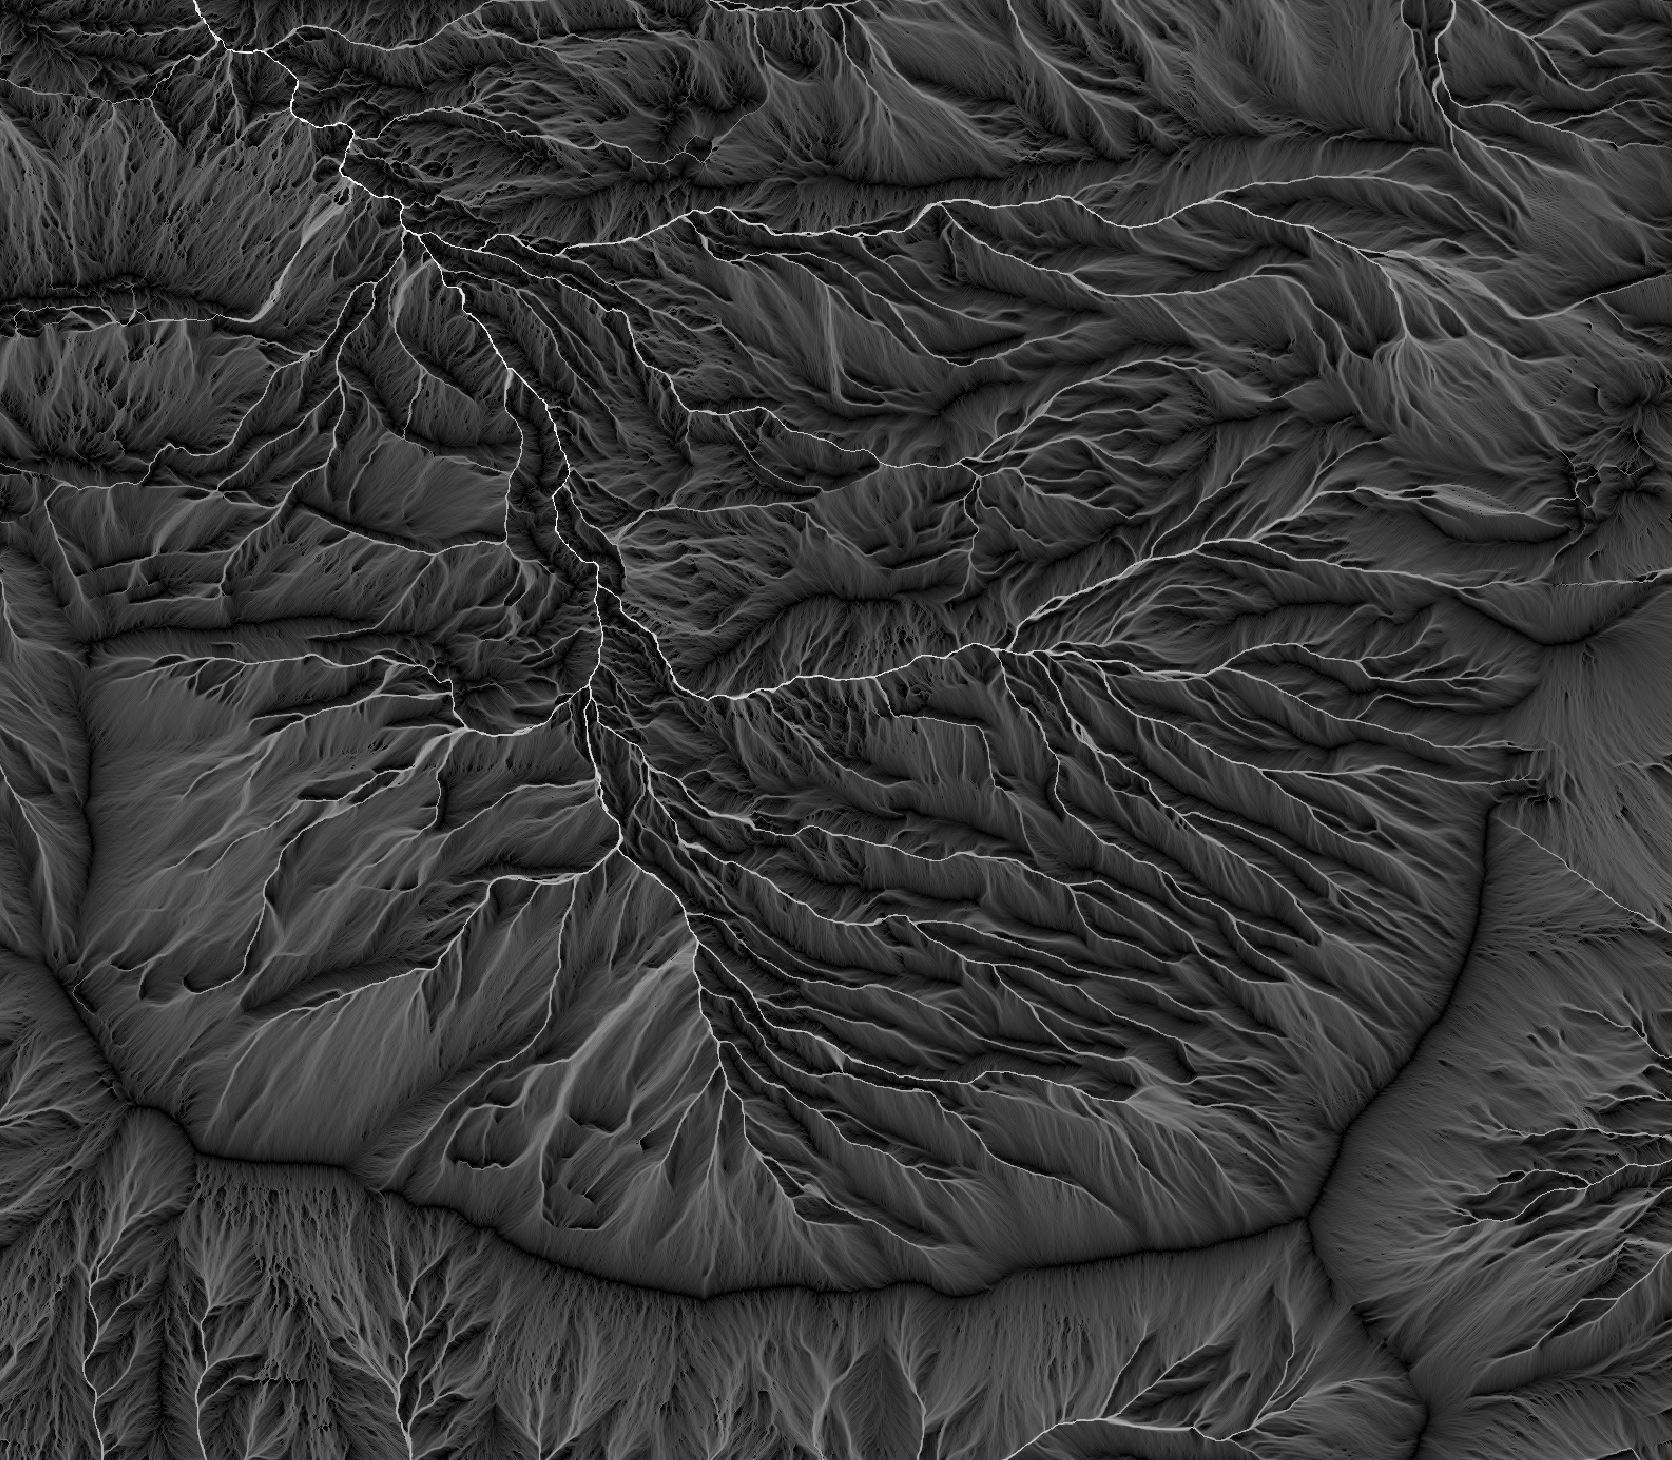
If Python 3 is not your default Python version, substitute python3 for python in the above command line. The final D-infinity flow accumulation raster can be displayed in any GIS software of choice and should look similar to Figure 5.